
MCP API Key Issuance and Usage Guide
This document provides a guide on the issuance process of the MCP API Key provided by the CROSS RAMP platform and the list of tasks that can be performed using this key.
Operations performed through the RAMP Console can also be executed using the MCP API.
1. Prerequisites
To issue an MCP API Key, the following preparatory steps must be completed.
1.1 CROSS RAMP Console Sign Up
To use the platform's services, you must first access the CROSS RAMP Console and sign up.
- Console URL: https://cross-ramp-console.crosstoken.io
1.2 Create CROSS RAMP Studio
After signing up, create a new Studio from the dashboard.
The MCP API Key is managed and issued at the studio level, making the creation of a studio essential.
- Reference Document: For detailed instructions on signing up and creating a studio, please refer to the official Project Creation Guide.
2. API Key Issuance Process
Once all prerequisites are met, you can issue the MCP API Key through the path below.
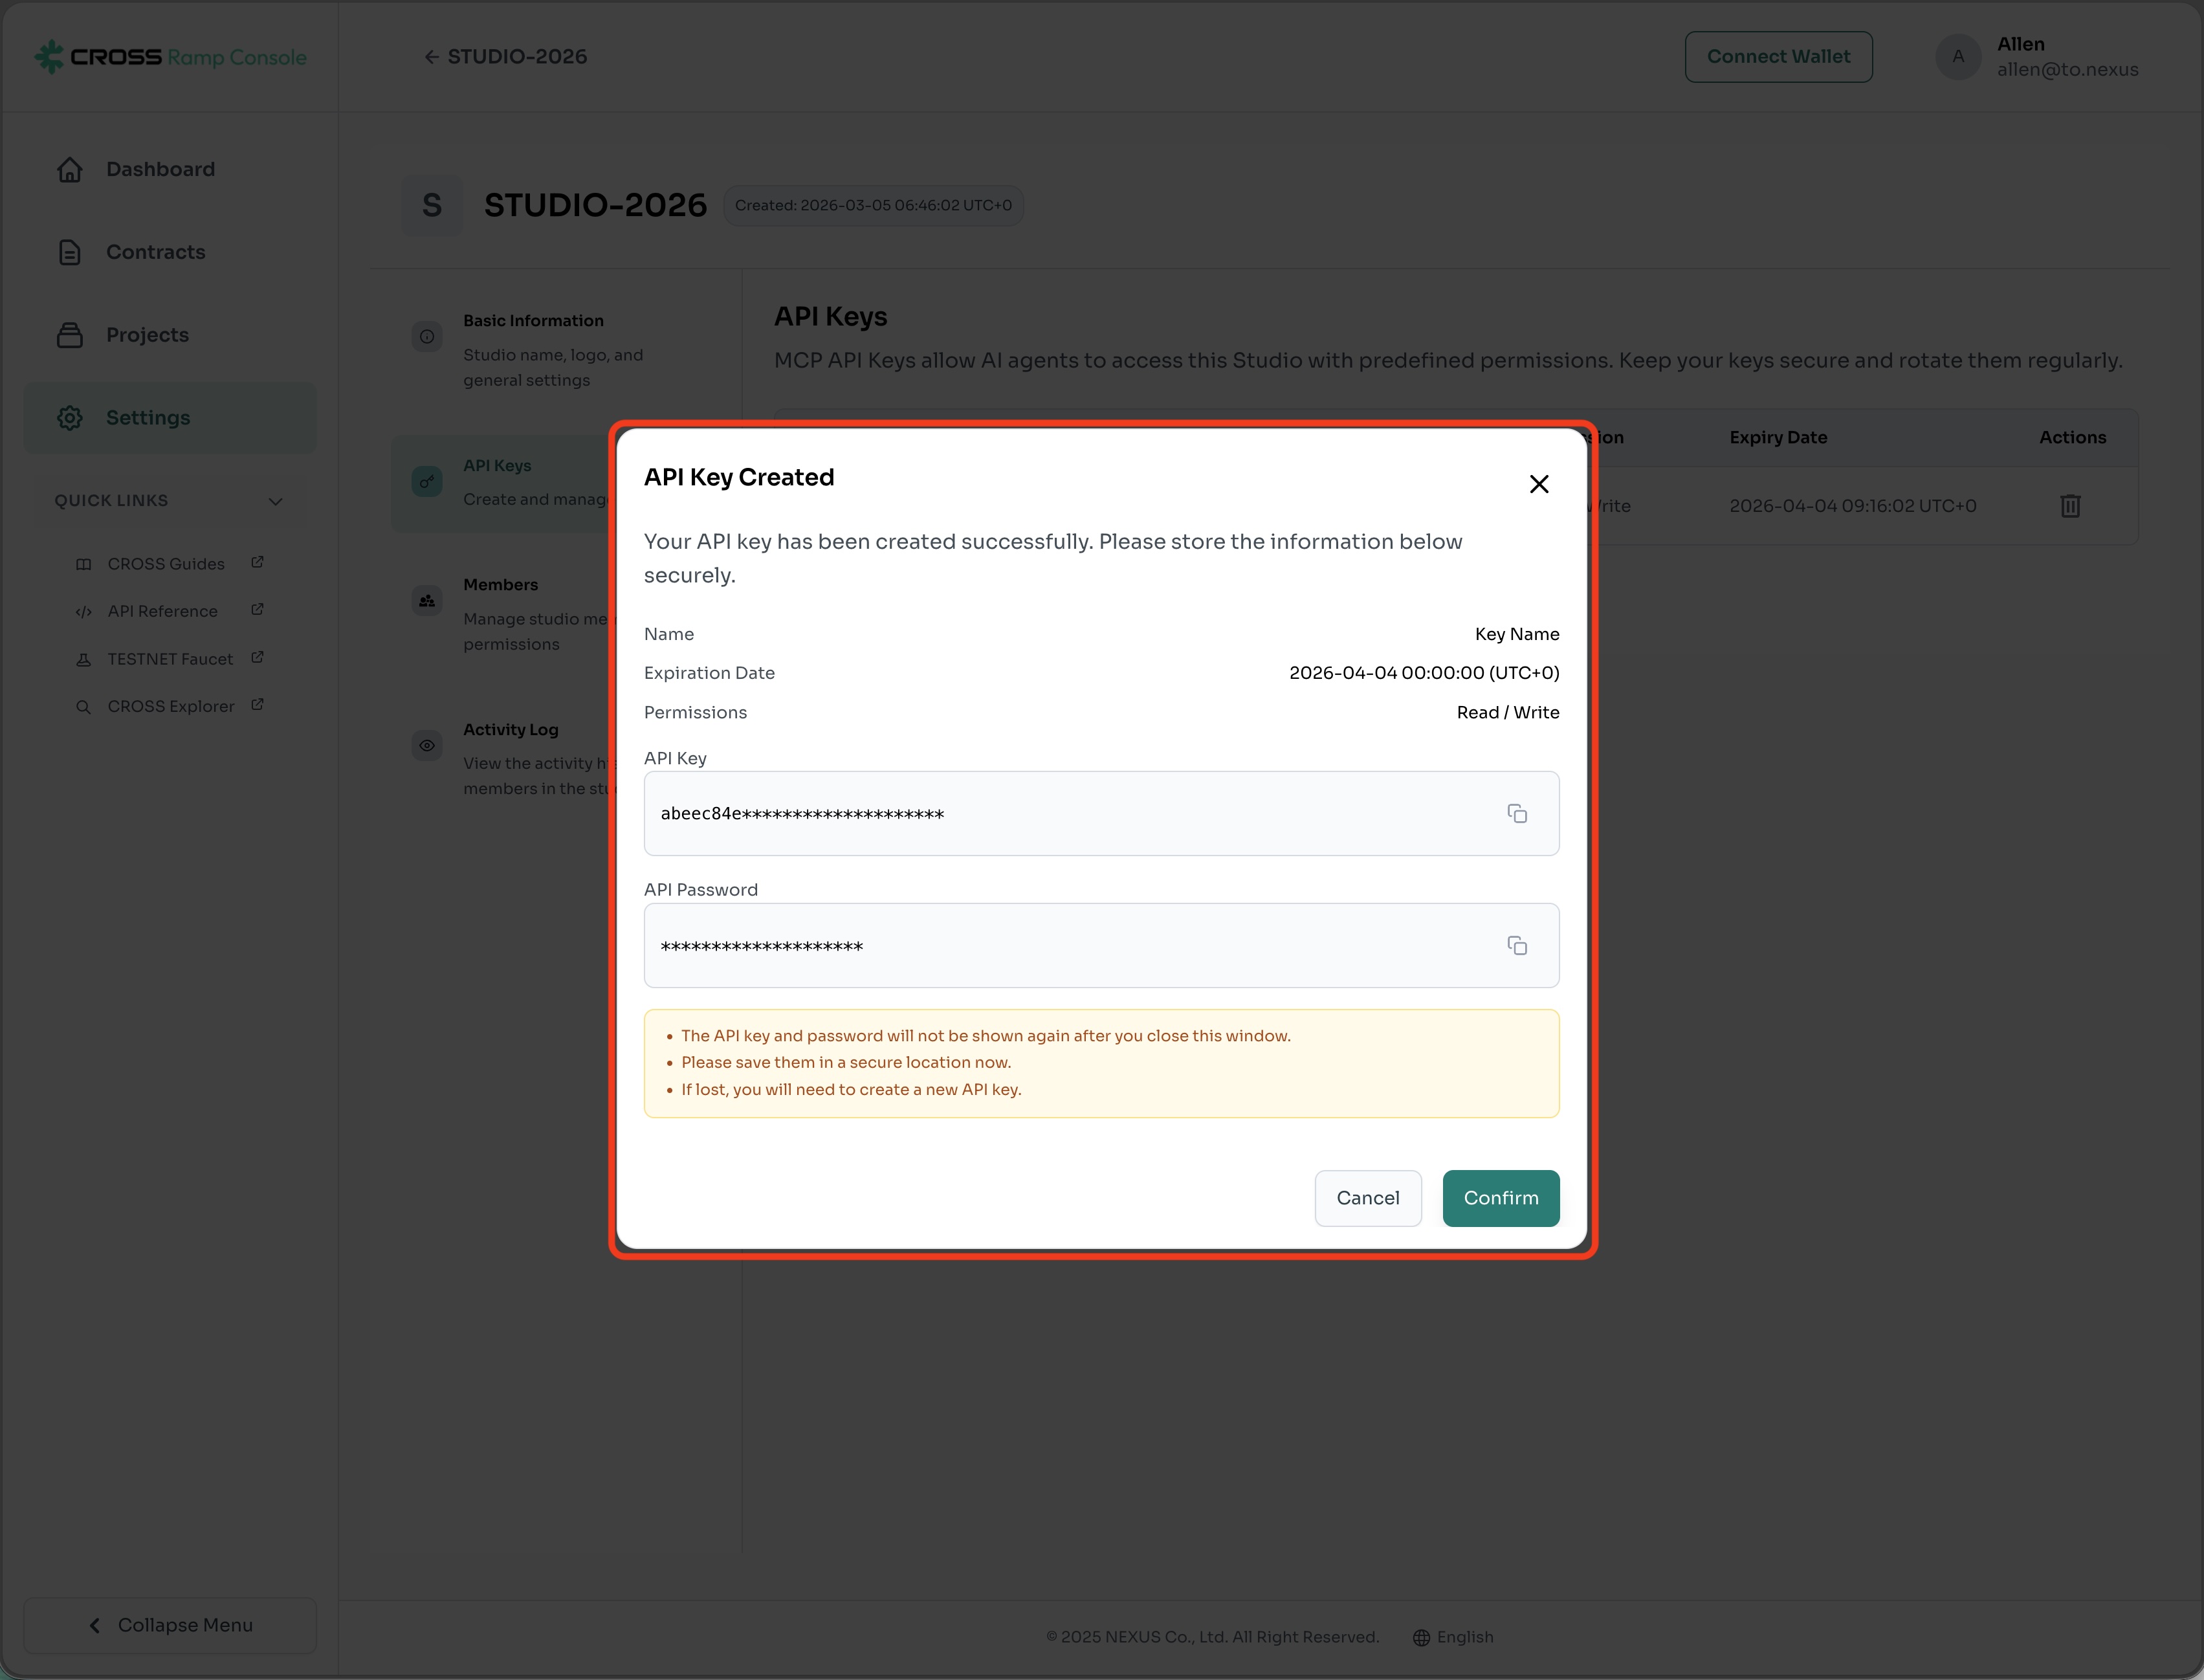
Note: It is impossible to view the issued API Key and Secret information again for security reasons, so please store them in a safe place immediately after creation.
- Log in to the CROSS RAMP Console and enter your studio environment.
- Go to the settings menu path:
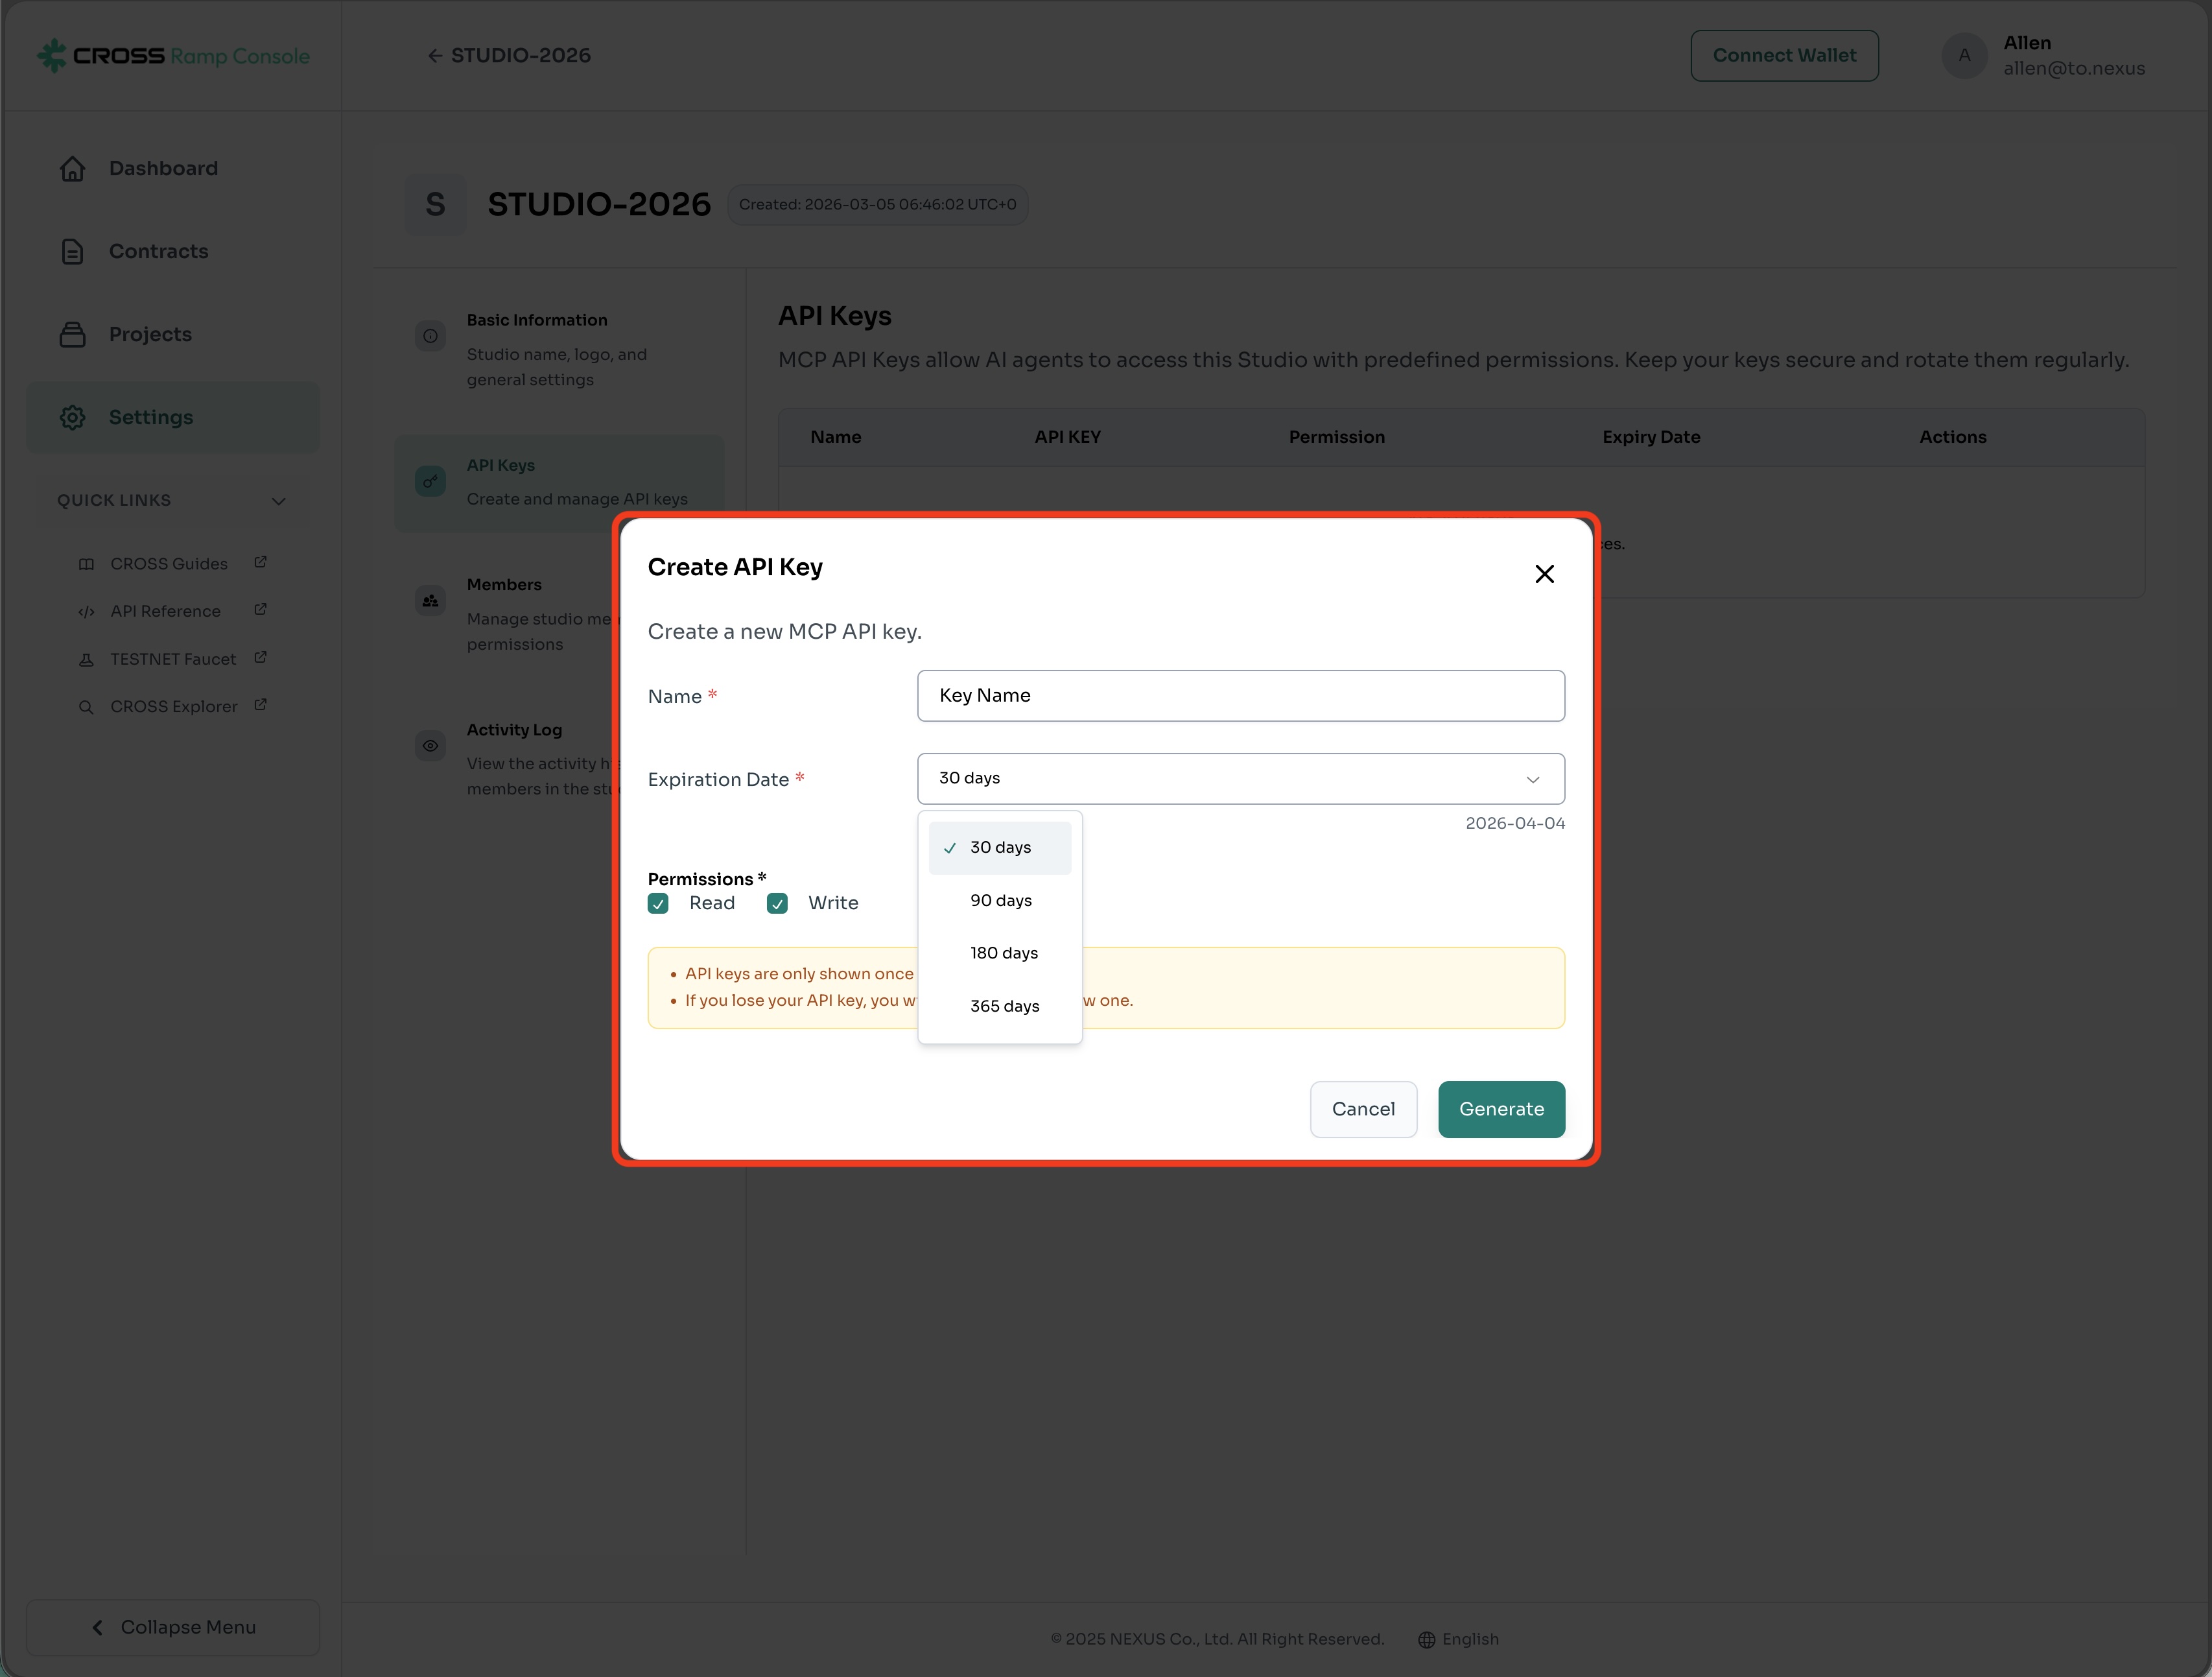
Studio>Settings>API Keys. - Proceed with issuing (creating) a new API Key.
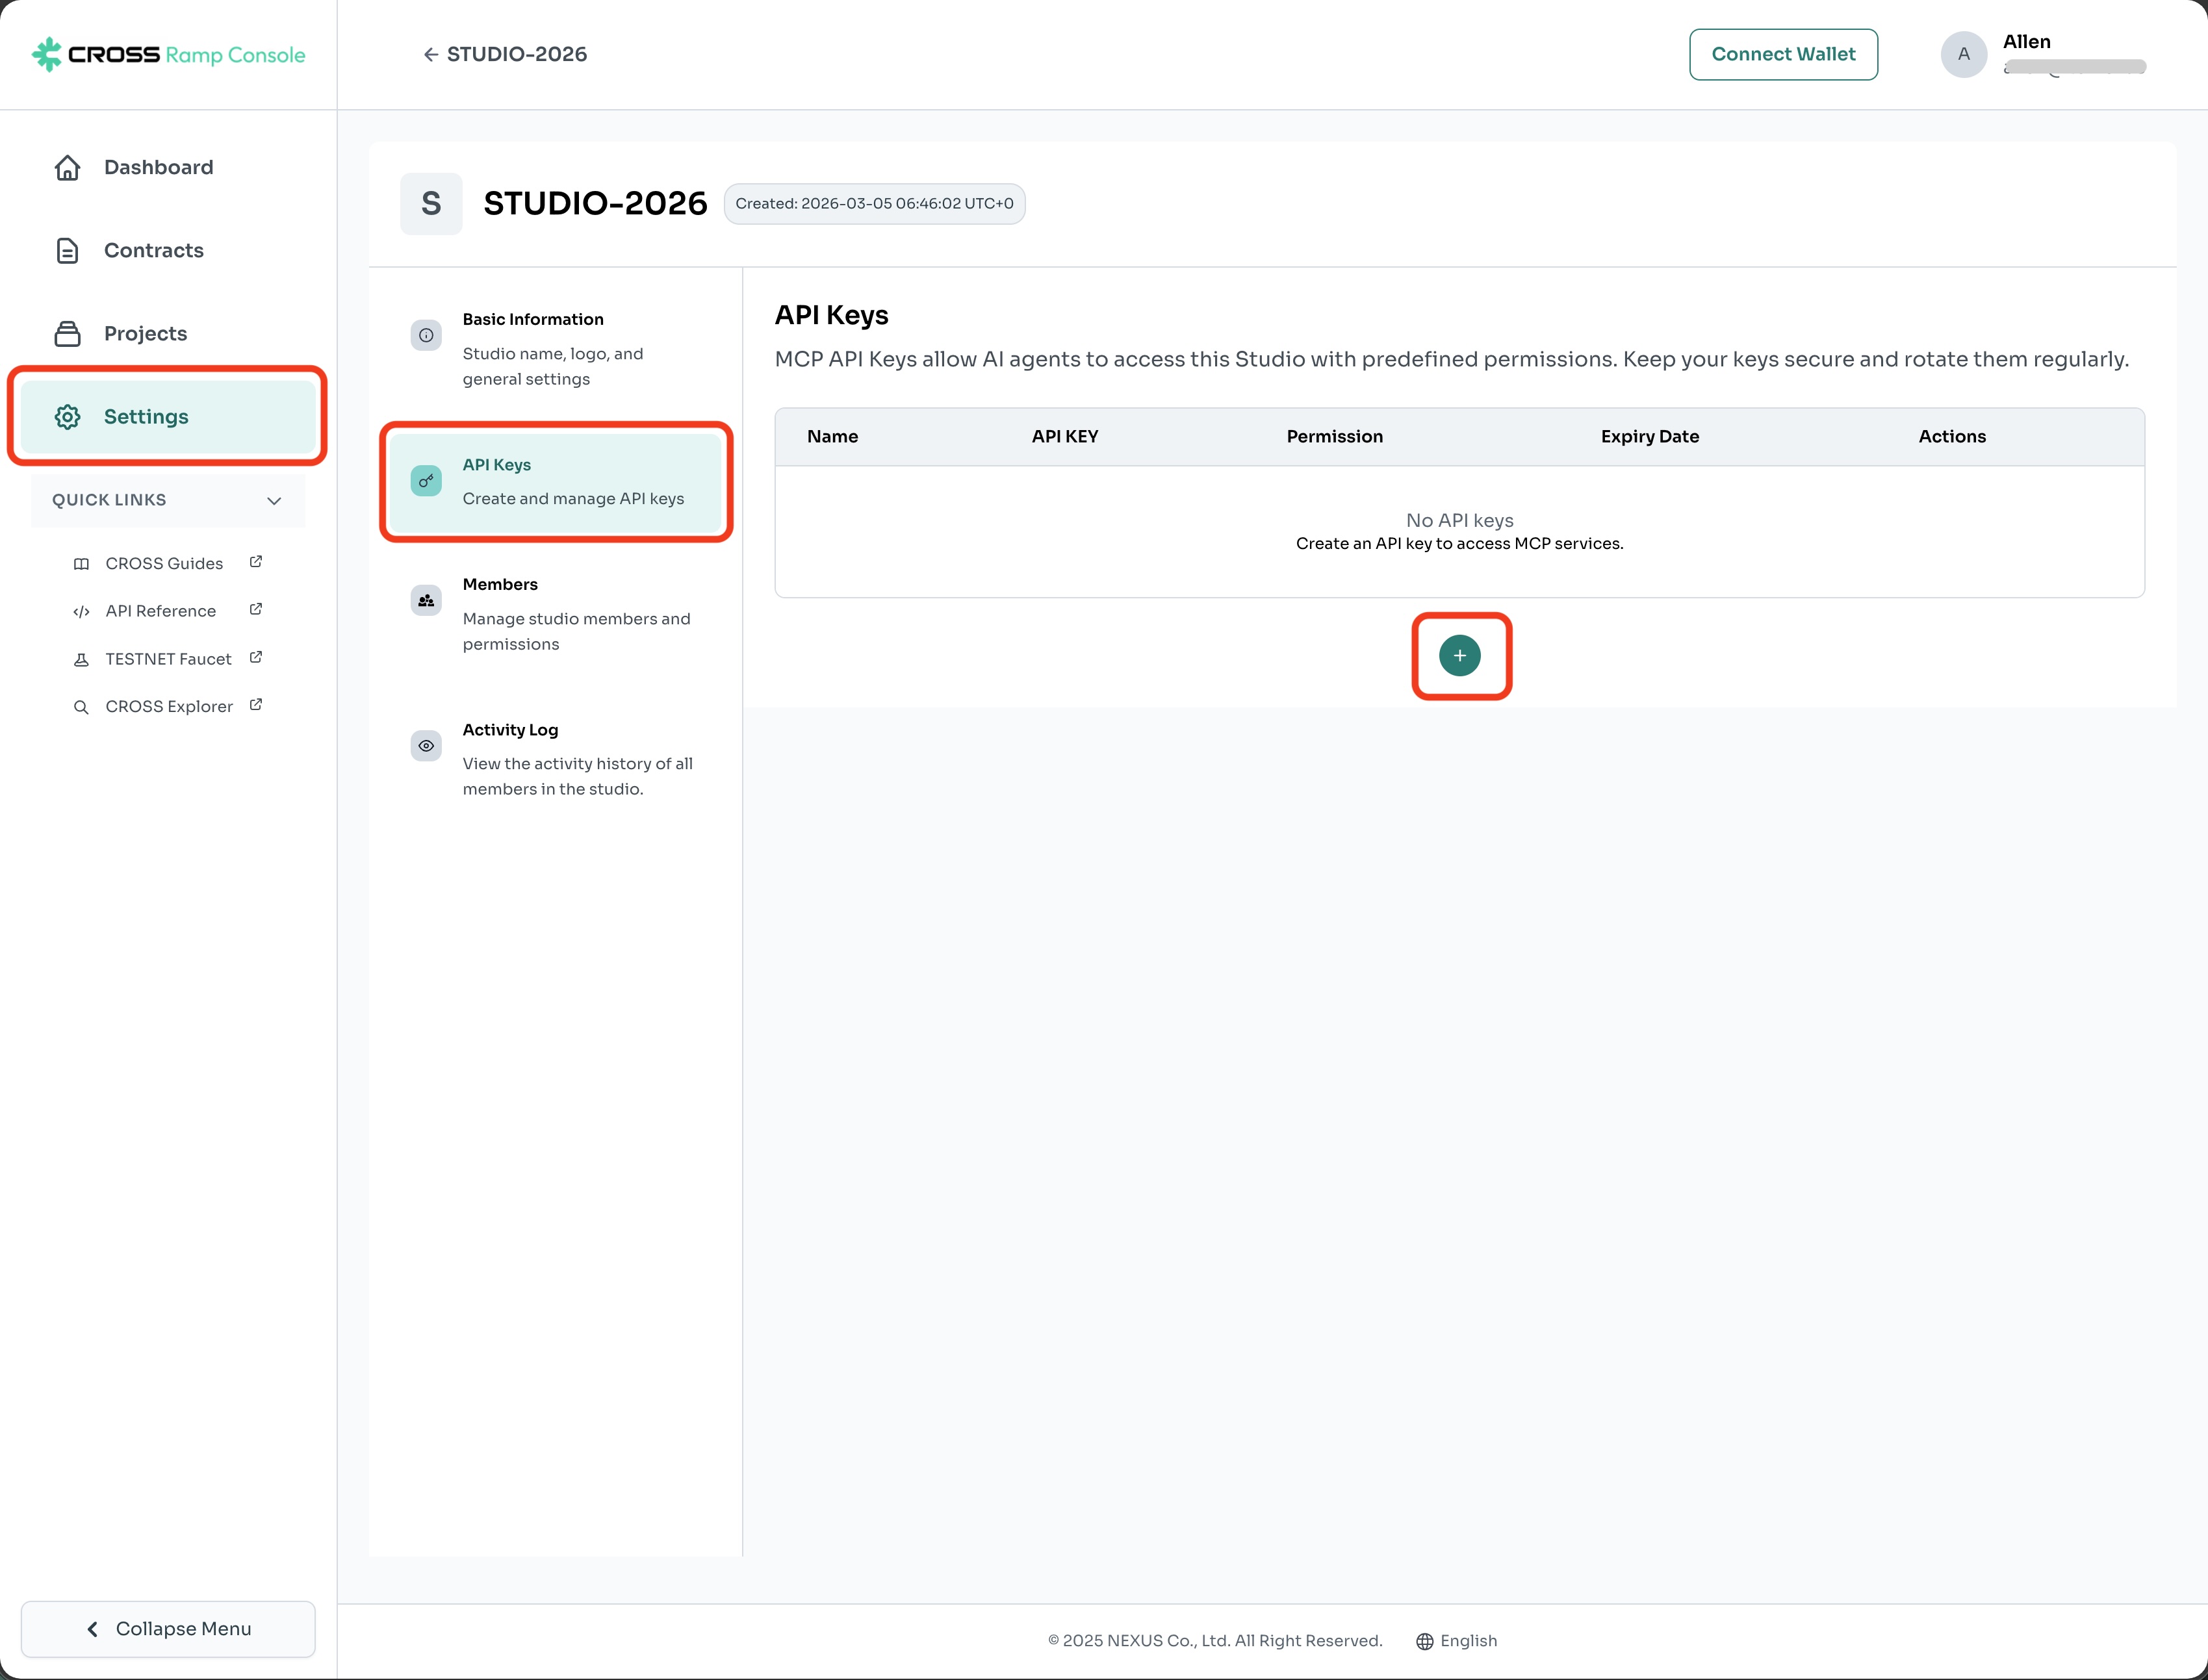
- When creating an API Key, you need to specify a Key name and a Key expiration date.
- This is the API Key creation completion screen.
3. Supported Operations
Using the issued MCP API Key as authentication, you can perform the following tasks in your application or API environment.
3.1 Project and Token Management
- Create Project and Deploy Token
- Modify and View Details of Existing Projects
- View Full List of Tokens Linked to the Studio
3.2 Security and Authentication Management
- Regenerate HMAC Secret: Renew the HMAC authentication secret used for webhook or API verification processes
4. MCP Configuration
The CROSS RAMP platform provides the Model Context Protocol (MCP) to support easy platform integration and rapid token deployment for indie developers.
To establish a seamless connection with an IDE that supports MCP, such as Cursor, you need to add the following mcp.json contents to your environment's configuration file.
Configuration Example
{
  "mcpServers": {
    "CROSS RAMP MCP": {
      "command": "npx",
      "args": ["-y", "mcp-ramp-server"]
    }
  }
}Tip: With the above configuration, you can activate the MCP feature within your IDE and interact conveniently with the CROSS RAMP API.
Updated 5 months ago